
Repository servers and the crucial role it plays today
Unlike 10 years ago, the way we use computers today has changed. With the CloudNative concept, many are migrating to Containerization technologies. Here, mostly using Docker or similar technologies are used to run applications within containers.
Previously, the process involved installing applications on a server and configuring them manually. However, contemporary practices are evolving rapidly. Presently, all the necessary components for a specific application are encapsulated within a container, allowing easy deployment by specifying the required parameters in a streamlined manner. To facilitate the deployment of these containers on servers, technologies such as Docker Compose, Kubernetes, OpenShift, and similar solutions are implemented already reducing operational burden.
One of the important points here is that versioning should be done for the application packages. The advantage we get from this is that if something goes wrong during application deployment, we can move the system to older versions immediately. All this is done by changing the application package version number. Since all behind the scenes have already been completed by the technologies mentioned above, there is no need to write a large number of automation scripts.
Needless to say, it is not advisable to store these application packages (or containerized applications) in standard file storages such as NFS, Samba or similar. Deploying containerized applications, packaged for CloudNative systems, with conventional storage systems can be challenging. Therefore, it would be better to adhere established open standards, such as Helm, Docker, etc.
So the indirect meaning here is that a system is needed so that a person entering a library can get the desired book more efficiently. Nowadays we call it repository server.
Utilization of a repository server in my home-lab
Experimenting with a lot of utilities (DevOps/System Administration) is my day-to-day habit. When doing that, I maintain a set of computers as my server setup. As everyone knows, experiments fail from time to time. Sometimes, I have to reinstall entire systems repeatedly. When that happens, I cannot rely on the Internet to fetch necessary packages. So, the plan is to design a central repository in my network. With this, I can handle my own Docker images, Helm charts, as well as self-hosted apt/yum repositories. I can experiment with a lot of CI/CD workflows within my network, keeping a repository server as a base.
On the other hand, I have disabled Internet connectivity for some of my servers within the network. So, those servers should have a repository to fetch things
The Installation process
Prepare separate location for data store
When setting up such a repository server, make sure that its data can be recovered at any time. Establishing a distinct data disk for Nexus proves advantageous as it safeguards Nexus-related data in the event of operating system corruption.
mkdir /opt/repodataAdded /etc/fstab mount point entry to mount new data disk into /opt/repodata.
UUID=bb08a8ce-b601-4215-90c8-a495b43e841c /opt/repodata ext4 errors=remount-ro 0 1Create User
Creating a separate user account on mounted data directory.
useradd -d /opt/repodata/nexus -m -U -s /bin/bash nexusMax open file descriptor limit should also be increased but the OS which I’m running currently made it unlimited.
# cat /proc/sys/fs/file-max
9223372036854775807
Anyone who is having a limit can change the value in /etc/security/limits.conf as mentioned below.
nexus hard nofile -1Java Installation
For Nexus repository to be function, Java 8 is the requirement. Debian 12 package management does not provide that package since it is pretty old. We have to go manual way in a standard manner. Download latest Java 8 version using this link and Install.
tar -xf jdk-8u381-linux-x64.tar.gz -C /opt
ln -svf /opt/jdk1.8.0_381 /opt/jdk8
Linking /opt/jdk8 to /opt/<jdk extraction directory> gives us the benifit of upgrading to newer Java 8 versions when they are available.
Then we have to make this Java installation default to the system.
update-alternatives --install /usr/bin/java java /opt/jdk8/bin/java 1Create a file inside /etc/profile.d/999-java.sh and insert following lines so the JAVA_HOME will be imported into every user in the system.
export JAVA_HOME="/opt/jdk8"
export PATH="$PATH:$JAVA_HOME/bin"
After re-login into the shell via SSH, check the availability of the above changes.
$ echo $PATH
/usr/local/bin:/usr/bin:/bin:/usr/local/games:/usr/games:/opt/jdk8/bin

$ echo $JAVA_HOME
/opt/jdk8
Download and setup nexus application
Log in as nexus user created above and Download sonatype Nexus repository using this link.
tar -xf nexus-3.64.0-03-unix.tar.gz
ln -svf /opt/repodata/nexus/nexus-3.64.0-03 nexus3
rm -rf sonatype-work
Symlinking the installation directory to make upgrades more easier.
Establish a dedicated sonatype-work directory external to the Nexus user profile. This designated directory serves as the repository for storing critical data. It plays a crucial role in disaster recovery scenarios, paying careful attention and maintenance.
mkdir /opt/repodata/sonatype-workConfigure the file /opt/repodata/nexus/nexus3/bin/nexus.vmoptions to change data directory location.
-Dkaraf.data=/opt/repodata/sonatype-work/nexus3
-Dkaraf.log=/opt/repodata/sonatype-work/nexus3/log
Starting the service
Now we have to start the nexus service for the first time. This handles initializing things (Username/Password). Since our plan is to preserve Nexus repository manager into a non privileged Linux user, issue following command as nexus user.
./nexus3/bin/nexus startGive it a moment. The service will start. To see the log real time, issue this command.
tail -f ../sonatype-work/nexus3/log/nexus.logAfter a perfect start. A message like following will appear.
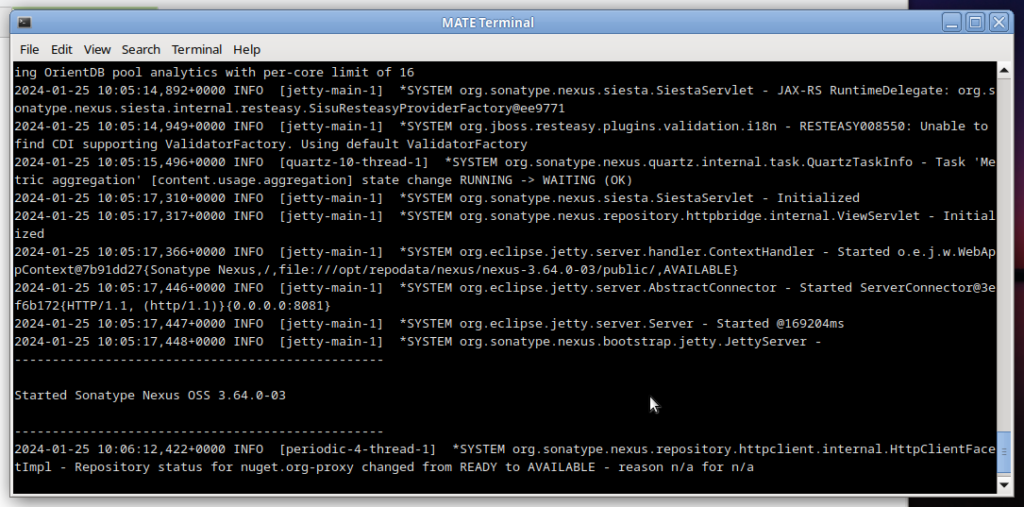
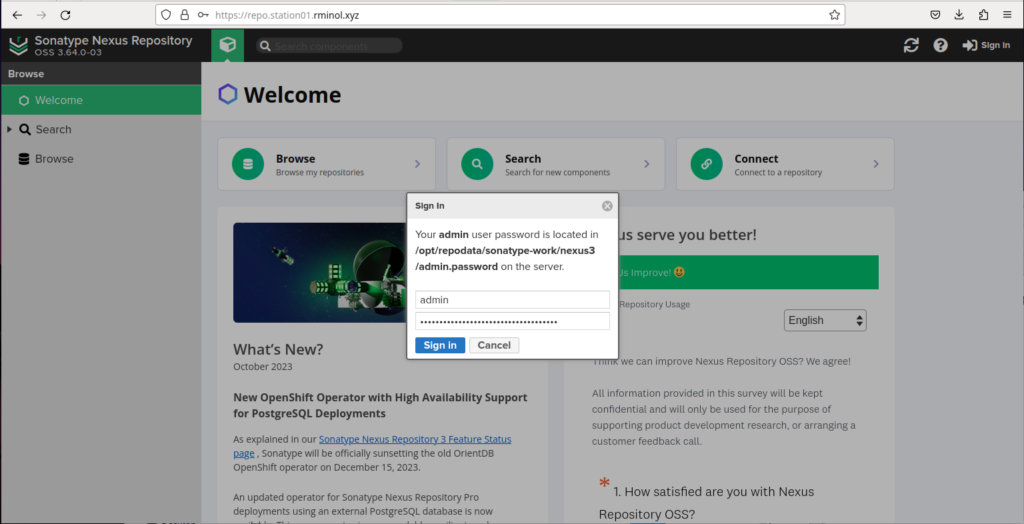
Now we need to access the repository server via web browser. The URL in below picture is the internal network URL configured via Apache to access the server (It will be covered later in this tutorial)
A message will appear to copy the value of the /opt/repodata/sonatype-work/nexus3/admin.password file. This file contains the initial password for admin user. After logging in, we have to change the admin password into a different.
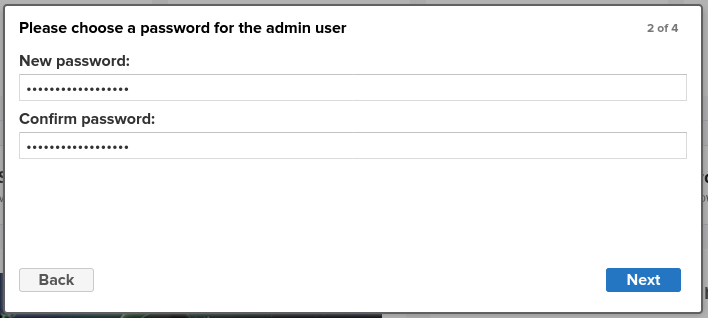
Click next to the opening wizard message windows and give a secure password for the admin user.
Disable anonymous access, leaving the option for later configuration based on permissions. This needs to be enabled especially for servers within the network to connect with apt/yum repositories. But as additional security measures globally disable and only allow anonymous access apt/yum repository level.

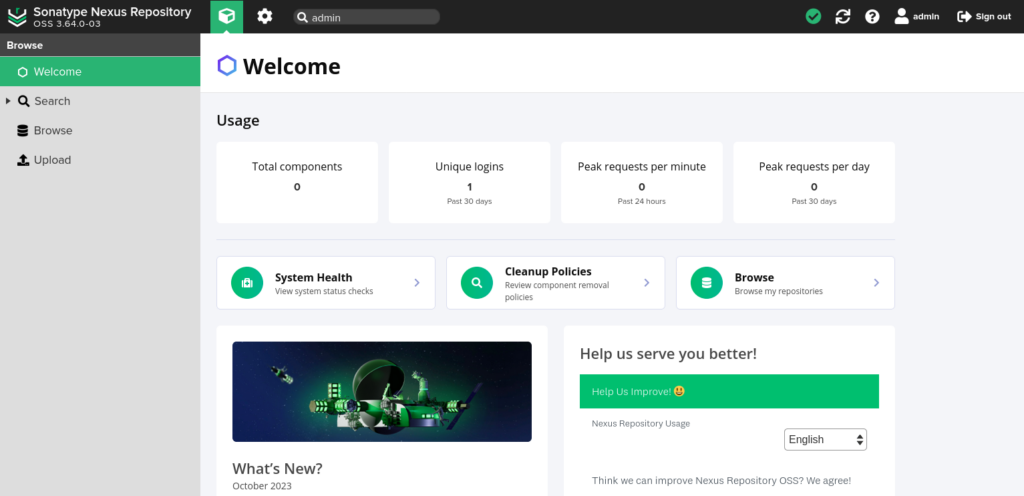
Complete and finish.
Automatically start on server reboots
Now when the server restarts this service will no longer up and running again. We have to configure it to automatically start when reboots happen. For this specific requirement we have to design Systemd Unit configuration file.
First stop the service manually.
./nexus3/bin/nexus stopCreate a file /etc/systemd/system/nexus.service and insert the below configuration into it.
[Unit]
Description=nexus service
After=network.target

[Service]
Type=forking
LimitNOFILE=65536
ExecStart=/opt/repodata/nexus/nexus3/bin/nexus start
ExecStop=/opt/repodata/nexus/nexus3/bin/nexus stop
User=nexus
Restart=on-abort

[Install]
WantedBy=multi-user.target
Give the exact command for ExecStart and ExecStop. Make the running user as nexus by setting User.
Running following command will reload systemd files newly added.
systemctl daemon-reload

# To enable it as a service
systemctl enable nexus

# To start the service
systemctl start nexus
Setup Apache server (as a proxy)
The Nexus Repository web interface typically operates on a distinct port. However, recalling and specifying the port number when referencing the server through its URL can be challenging, potentially resulting in configuration errors within the network. In addition, when dealing with Docker repositories, there is a further necessity for an additional DNS name to the Docker registry.
To address these challenges effectively, one solution is the implementation of a reverse proxy. This approach enables us to streamline the process, mitigating the complexities associated with managing port numbers and facilitating seamless referencing Docker repositories and other kind of repositories.
Install Apache into the Linux environment and create a configuration file /etc/apache2/sites-enabled/repo.example.com.conf.
<VirtualHost *:80>
  ServerName repo.example.com
  ServerAdmin admin@repo.example.com

  ProxyRequests Off
  ProxyPreserveHost On
  ProxyPass / http://localhost:8081/
  ProxyPassReverse / http://localhost:8081/
  RequestHeader set X-Forwarded-Proto "http"

  ErrorLog logs/repo.example.com/error.log
  CustomLog logs/repo.example.com/access.log common
</VirtualHost>
After a successful restart of the service, the repository server can be accessed. Additional repository configuration can be continued from here onwards.