I have been exploring options for establishing a home-lab computer setup over an extended period. A primary challenge I’ve encountered pertains to establishing a robust networking infrastructure capable of effectively blocking, routing, and isolating various secure compartments within the system while ensuring continuous 24-hour operation of the network. Conventional routers supplied by contemporary Internet Service Providers (ISPs) lack the necessary capabilities to fulfill these requirements.
But networks with custom made firewalls are capable of
- DHCP handling.
- Handling DNS of the entire network.
- DNS request encryption.
- Port forwarding.
- DHCP lease analyzing.
- Deep packet analyzing.
- Routing the traffic of entire network through a VPN.
- Traffic shaping.
- Blocking annoying malicious blacklisted websites from entire network.
And many more.
For such a setup, Pfsense CE serves as the ideal firewall software. Subsequently, let’s outline a minimal working setup for a computer homelab from this stage onwards.
Basic hardware used
- An old PC (at least intel i* 4th gen family) with 4GB RAM.
- Minimum 128GB hard drive space is sufficient (SSD or any other).
- USB pen drive to install Pfsense OS.
- For a router there should be at least two Ethernet ports. To achieve this, used another Gigabit Ethernet PCI expansion card.
- A Gigabit network switch.
Most modern hardware commonly supports Gigabit Ethernet, which can significantly enhance entire network’s speed. To achieve a Gigabit network, opt for superior hardware like a Network Switch that supports Gigabit speeds. Ensure all servers or personal computers connected to the network possess Gigabit Ethernet ports, typically operating at 1000Mbit/s speeds.
When using a Network Attached Storage (NAS) accessible to all network servers, a decent speed is essential. While 10 Gigabit exceeds the necessity, it tends to be costly. For hardware virtualization and clustering like Proxmox clustering, a high-speed connection to the central NAS storage is advisable. However, this falls under the advanced aspects of networking setups.
The installation
Downloaded Pfsense from the official website.
https://www.pfsense.org/download/?section=downloads
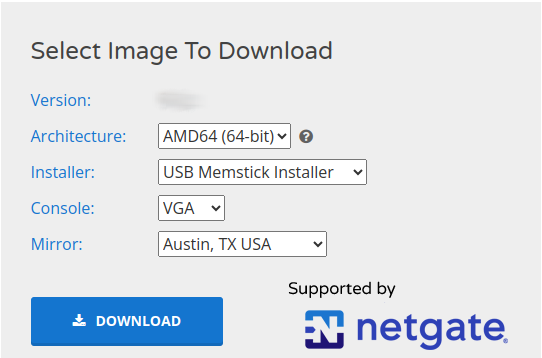
Set installer type memstick installer and console mode to VGA.
Preparation of memory stick installer can be done using following command.
dd if=./pfSense-CE-memstick-<version>-RELEASE-amd64.img of=/dev/sdb status=progressUsed the installation guideline from Pfsense Documentation. Disk partitioning can be skipped leaving it automatic.
Installer asks which interface to choose as WAN interface. That will be the port which we are planning to connect to Router/Modem WAN cable. An IP address will be assigned by the ISP router as an example shown below 192.168.8.111.
A network within the range 192.168.1.1/24 will be assigned to the LAN interface. It will be 192.168.1.1. Typing https://192.168.1.1/ in the browser log into the Pfsense web console. User name will be admin and the password will be pfsense. Username and password should be changed after initial setup. Go through the setup wizard and change LAN network address range into a different local network addressing (Something similar 10.20.2.0/24 or any address range preferred for Local Area Networks).
Basic coverage of the network
A diagram illustrating the network components and their respective functions would be adequate. Here is a minimalistic network design suitable for a home lab, which can be scaled up by incorporating advanced hardware in the future.
Pfsense has options to directly connect bridge mode with ISP provided modem/router. Then the Public static IP will be assigned into the WAN port of the firewall.
But here the approach was different and the ISP router’s local network is WAN to the Firewall.
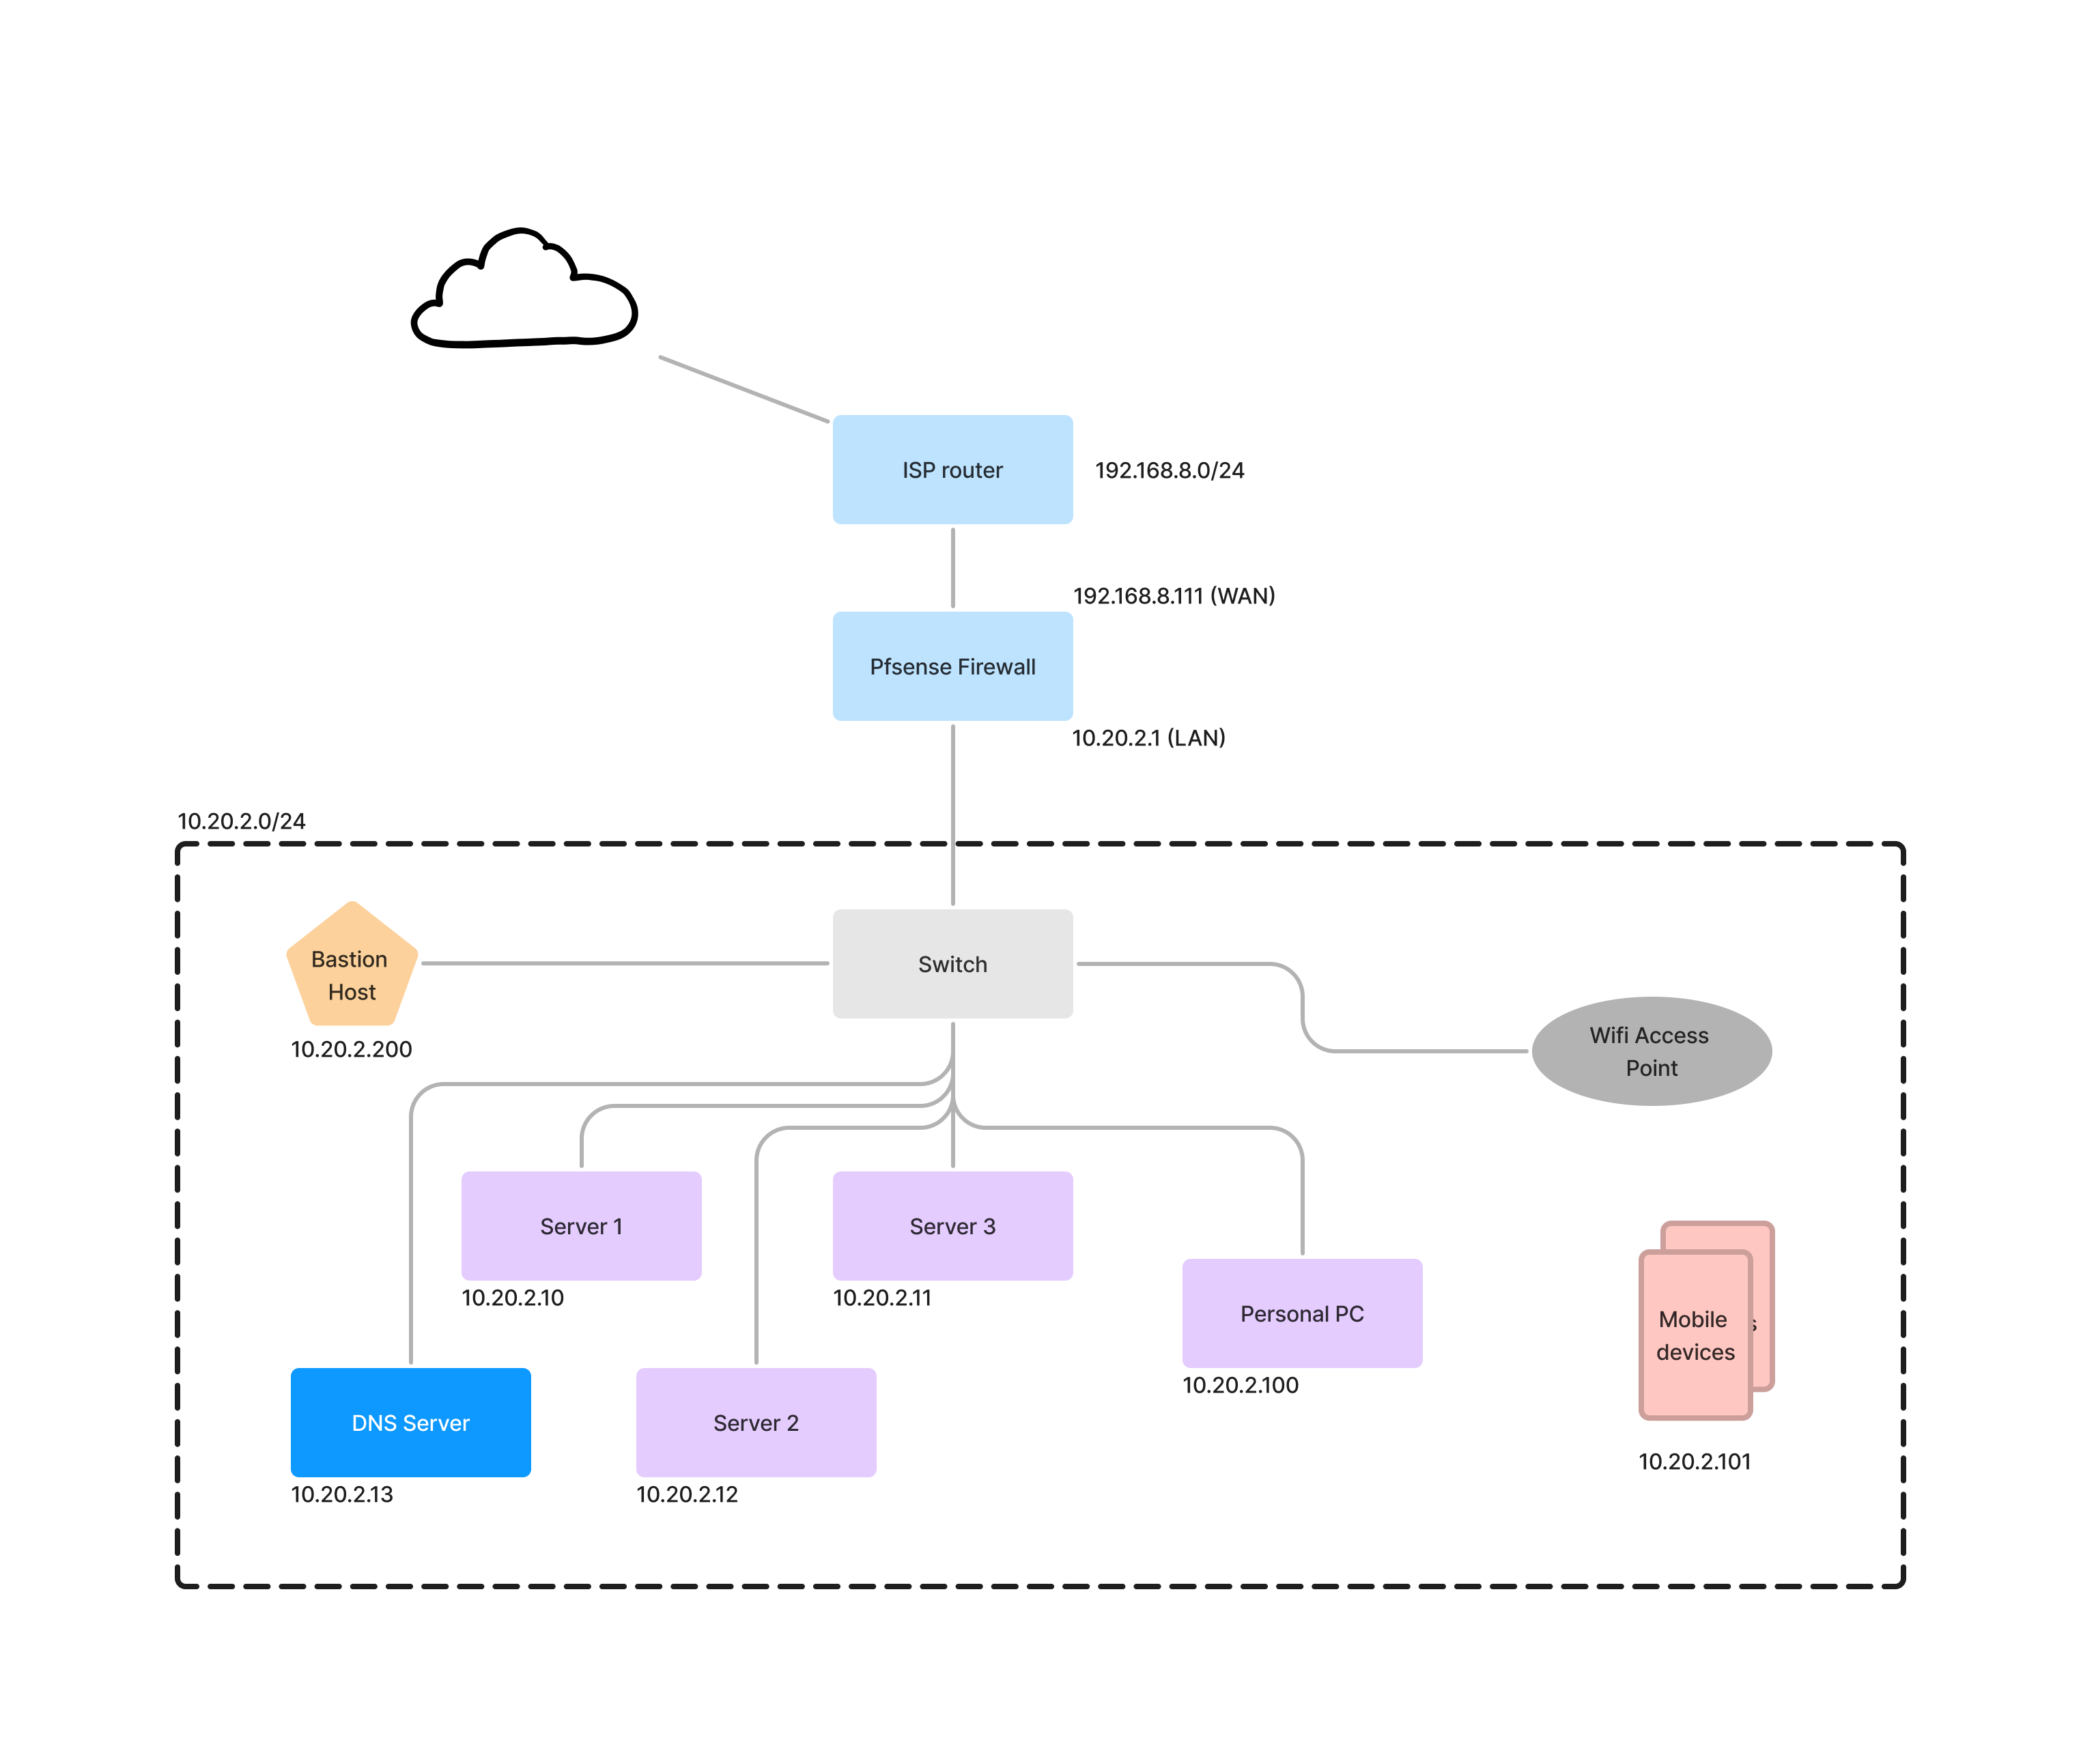
Let’s start reading the architecture from the beginning.
IP addressing
If an attacker get access to the network and find the network address range (Currently it is 10.20.2.0/24), definitely guess the gateway IP as 10.20.2.1.
So it’s up to network designer to look for another valid IP which is not easily guessable.
By navigating Interfaces > LAN, we can change the gateway IP for the local network.

DNS configuration of the network
A preferable approach is to refer servers by their names rather than relying on IP addresses. This is because IP addresses can change, even if they are set as static, particularly during network upgrades where the entire network addressing might undergo modifications. Therefore, it’s advisable to avoid hard-coding IPs into the applications developed within the local network.
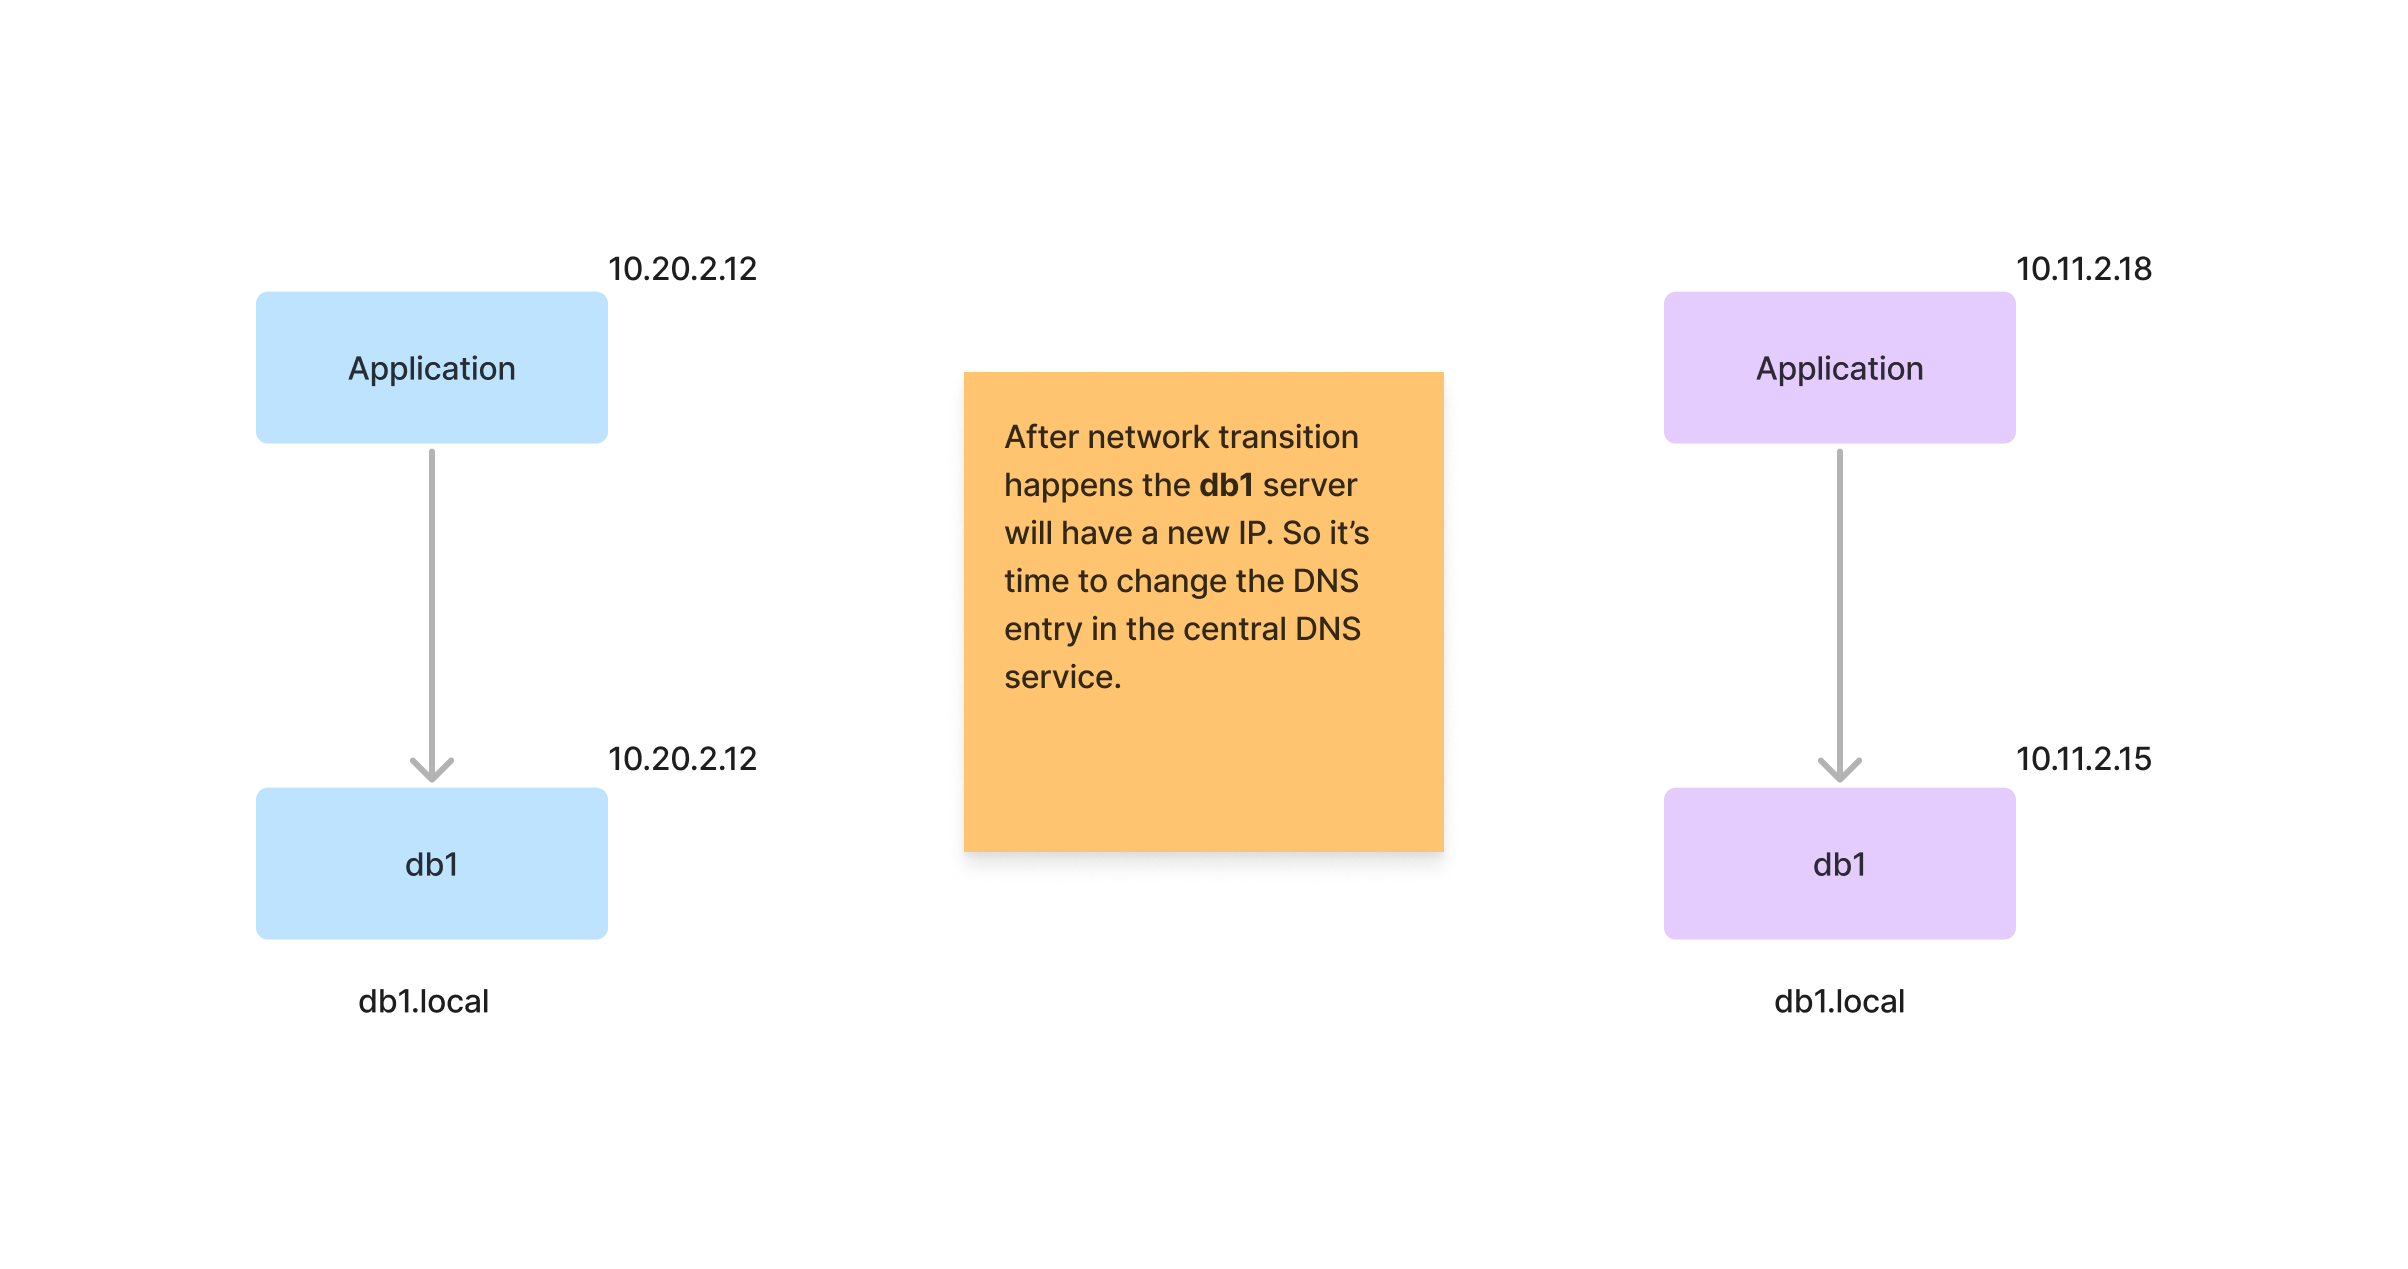
Consider a scenario where a simple application residing within the network. When sudden network change happens we have to traverse through each and every configuration of the system looking for database URL if the IP is hard-coded. Who knows this much of advanced configurations after few months of development? Then definitely there should be a way to change DNS single handedly.
For this we can utilize Pfsense existing DNS service and can have custom name mappings for IP addresses. Services -> DNS Resolver -> Host Overrides section can be utilized to give name mappings to the IPs in the network. This way unbound (Pfsense DNS handler) will resolve IPs for the host entry without going round-trip to upstream servers.

The bastion host
The area beyond the ISP router’s firewall, commonly known as The Internet, is considered a battleground.
When external to the network, accessing network compartments isn’t feasible without preventing potential intruders from gaining entry. To meet this need, a specialized form of fortification is necessary.
Consider, for instance, enabling SSH communication to the network. Employing a bastion-like host as a jump server, intensively monitored, proves beneficial. This involves straightforwardly redirecting the SSH port of the bastion host to a custom port number accessible from The Internet.
It’s essential to actively monitor SSH failed attempts using a tool like fail2ban and provide directives to block undesired IPs from the Pfsense firewall. For this specific scenario, a custom mechanism needs to be implemented within the network.
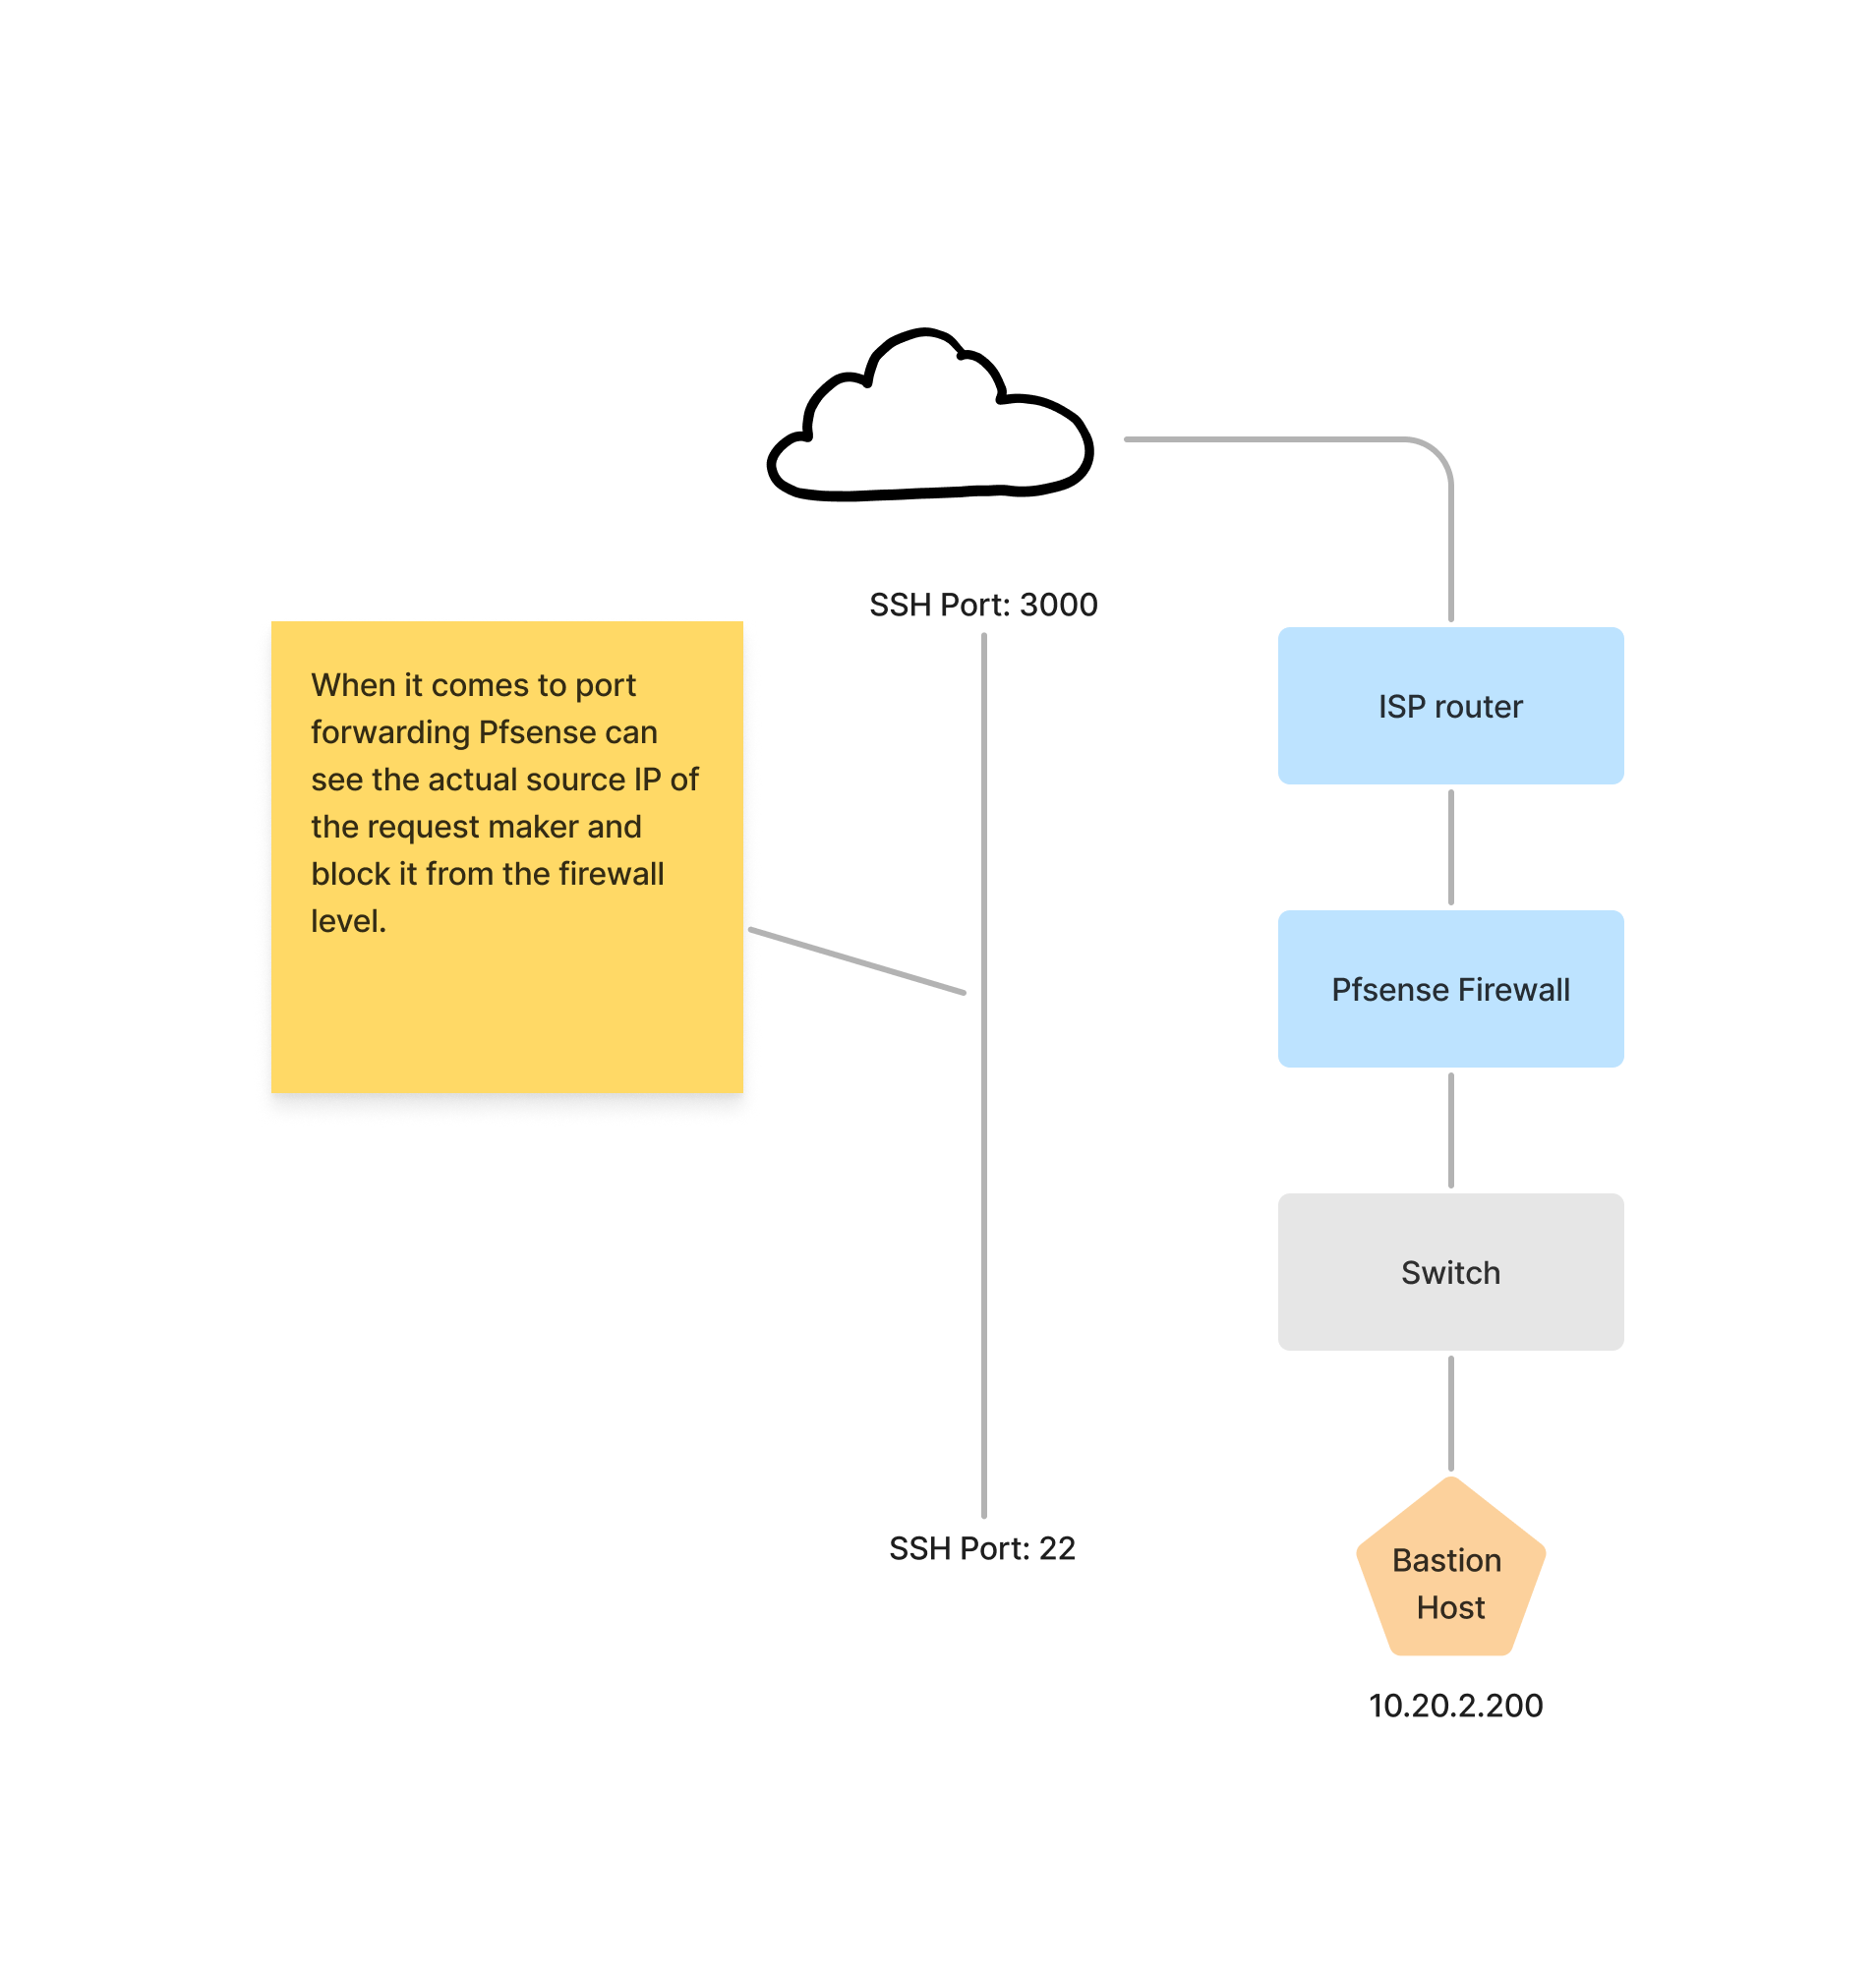
A potential approach involves leveraging specific mechanisms, such as the reset API, to instruct the Pfsense firewall to block a particular IP or redirect the malicious connection to a honeypot 🙂. The beauty of a firewall like Pfsense allows for this level of control, putting you in command of the entire network.
Let’s keep it to “An advanced Network” topic.
Isolate servers from the Internet
When dealing with highly secure servers like database servers and log monitoring systems that must remain disconnected from the public internet, implementing Internet isolation stands as the primary security measure. As per OWASP’s top 10, SQL injection ranks as a major concern. I’ve witnessed skilled attackers gaining shell access to a database server via reverse TCP tunnels, leading to the compromise of the entire system. To mitigate such risks, a custom firewall like Pfsense or Opensense becomes indispensable. These firewalls allow for the blocking of internet communication while permitting local network interactions, providing a critical layer of protection.
For example currently a server within the network can communicate with internet. A ping to the IP 8.8.8.8 shows us it’s ability to communicate with Internet.

Following this, a network rule will be added to the LAN rule settings to prevent any connections that are not intended for the 10.20.2.0/24 range. (Firewall -> Rules -> LAN Tab). Below pseudo code will explain more.
Action: Block
Protocol: Any
Source: 10.20.2.10
Destination: not 10.20.2.0/24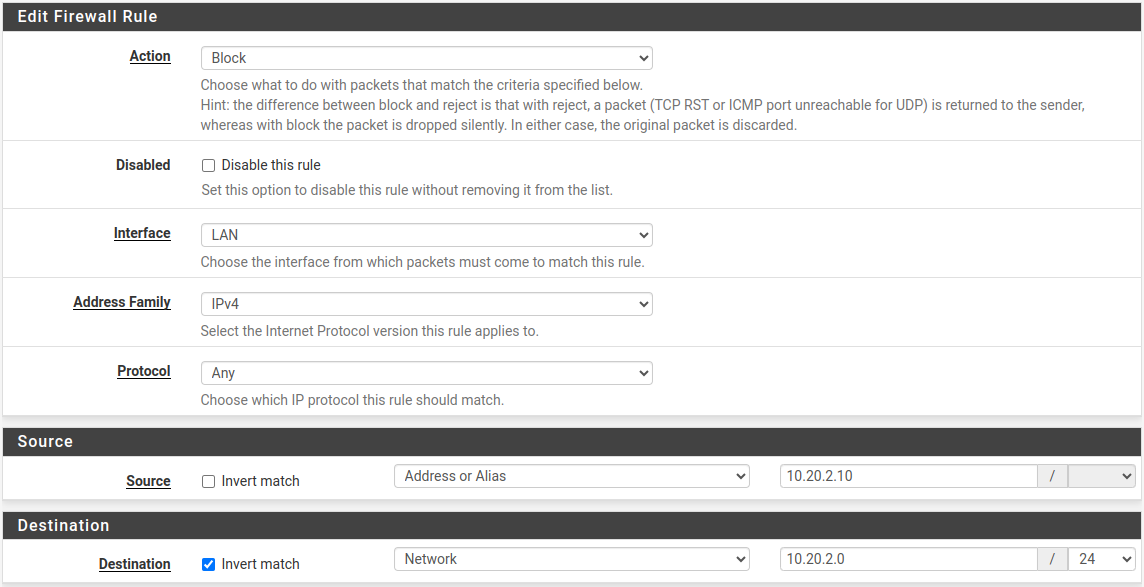
Then when another ping session started, connection does not happens.

There is a series of videos in this list which is targeting instructions for a fully protected home network. If installation process is unclear use this Video series.
Some pictures of the project
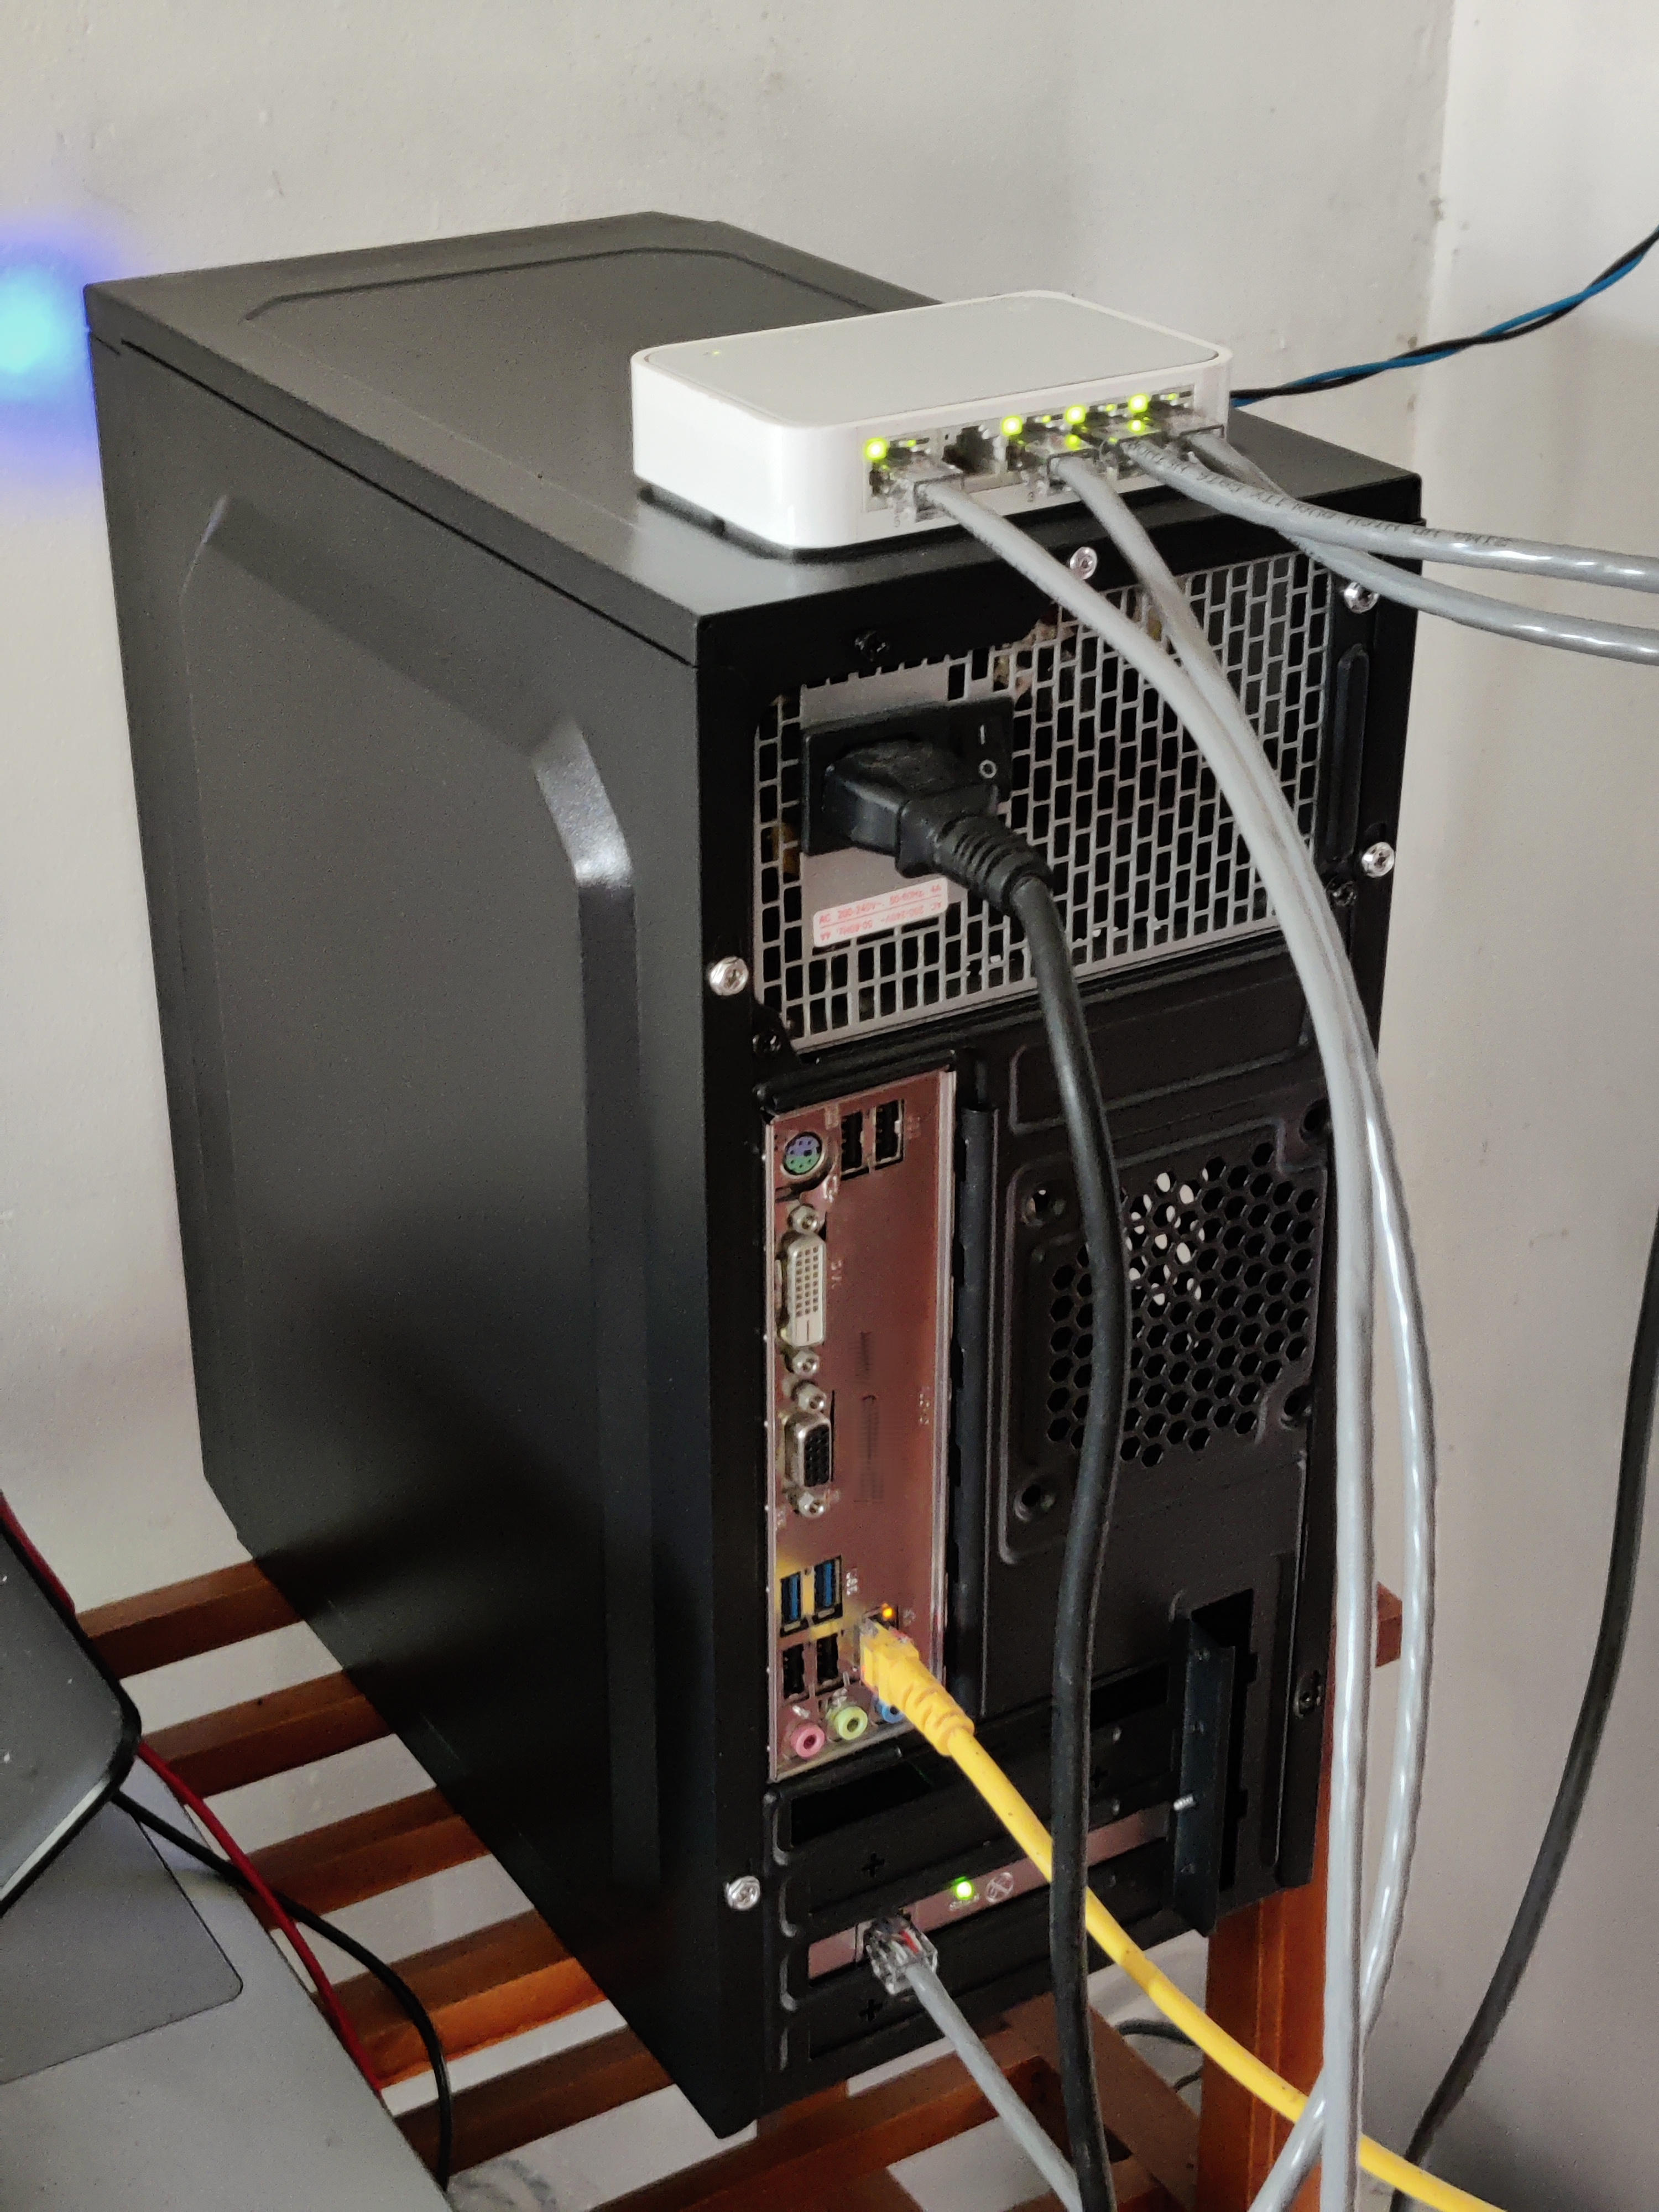
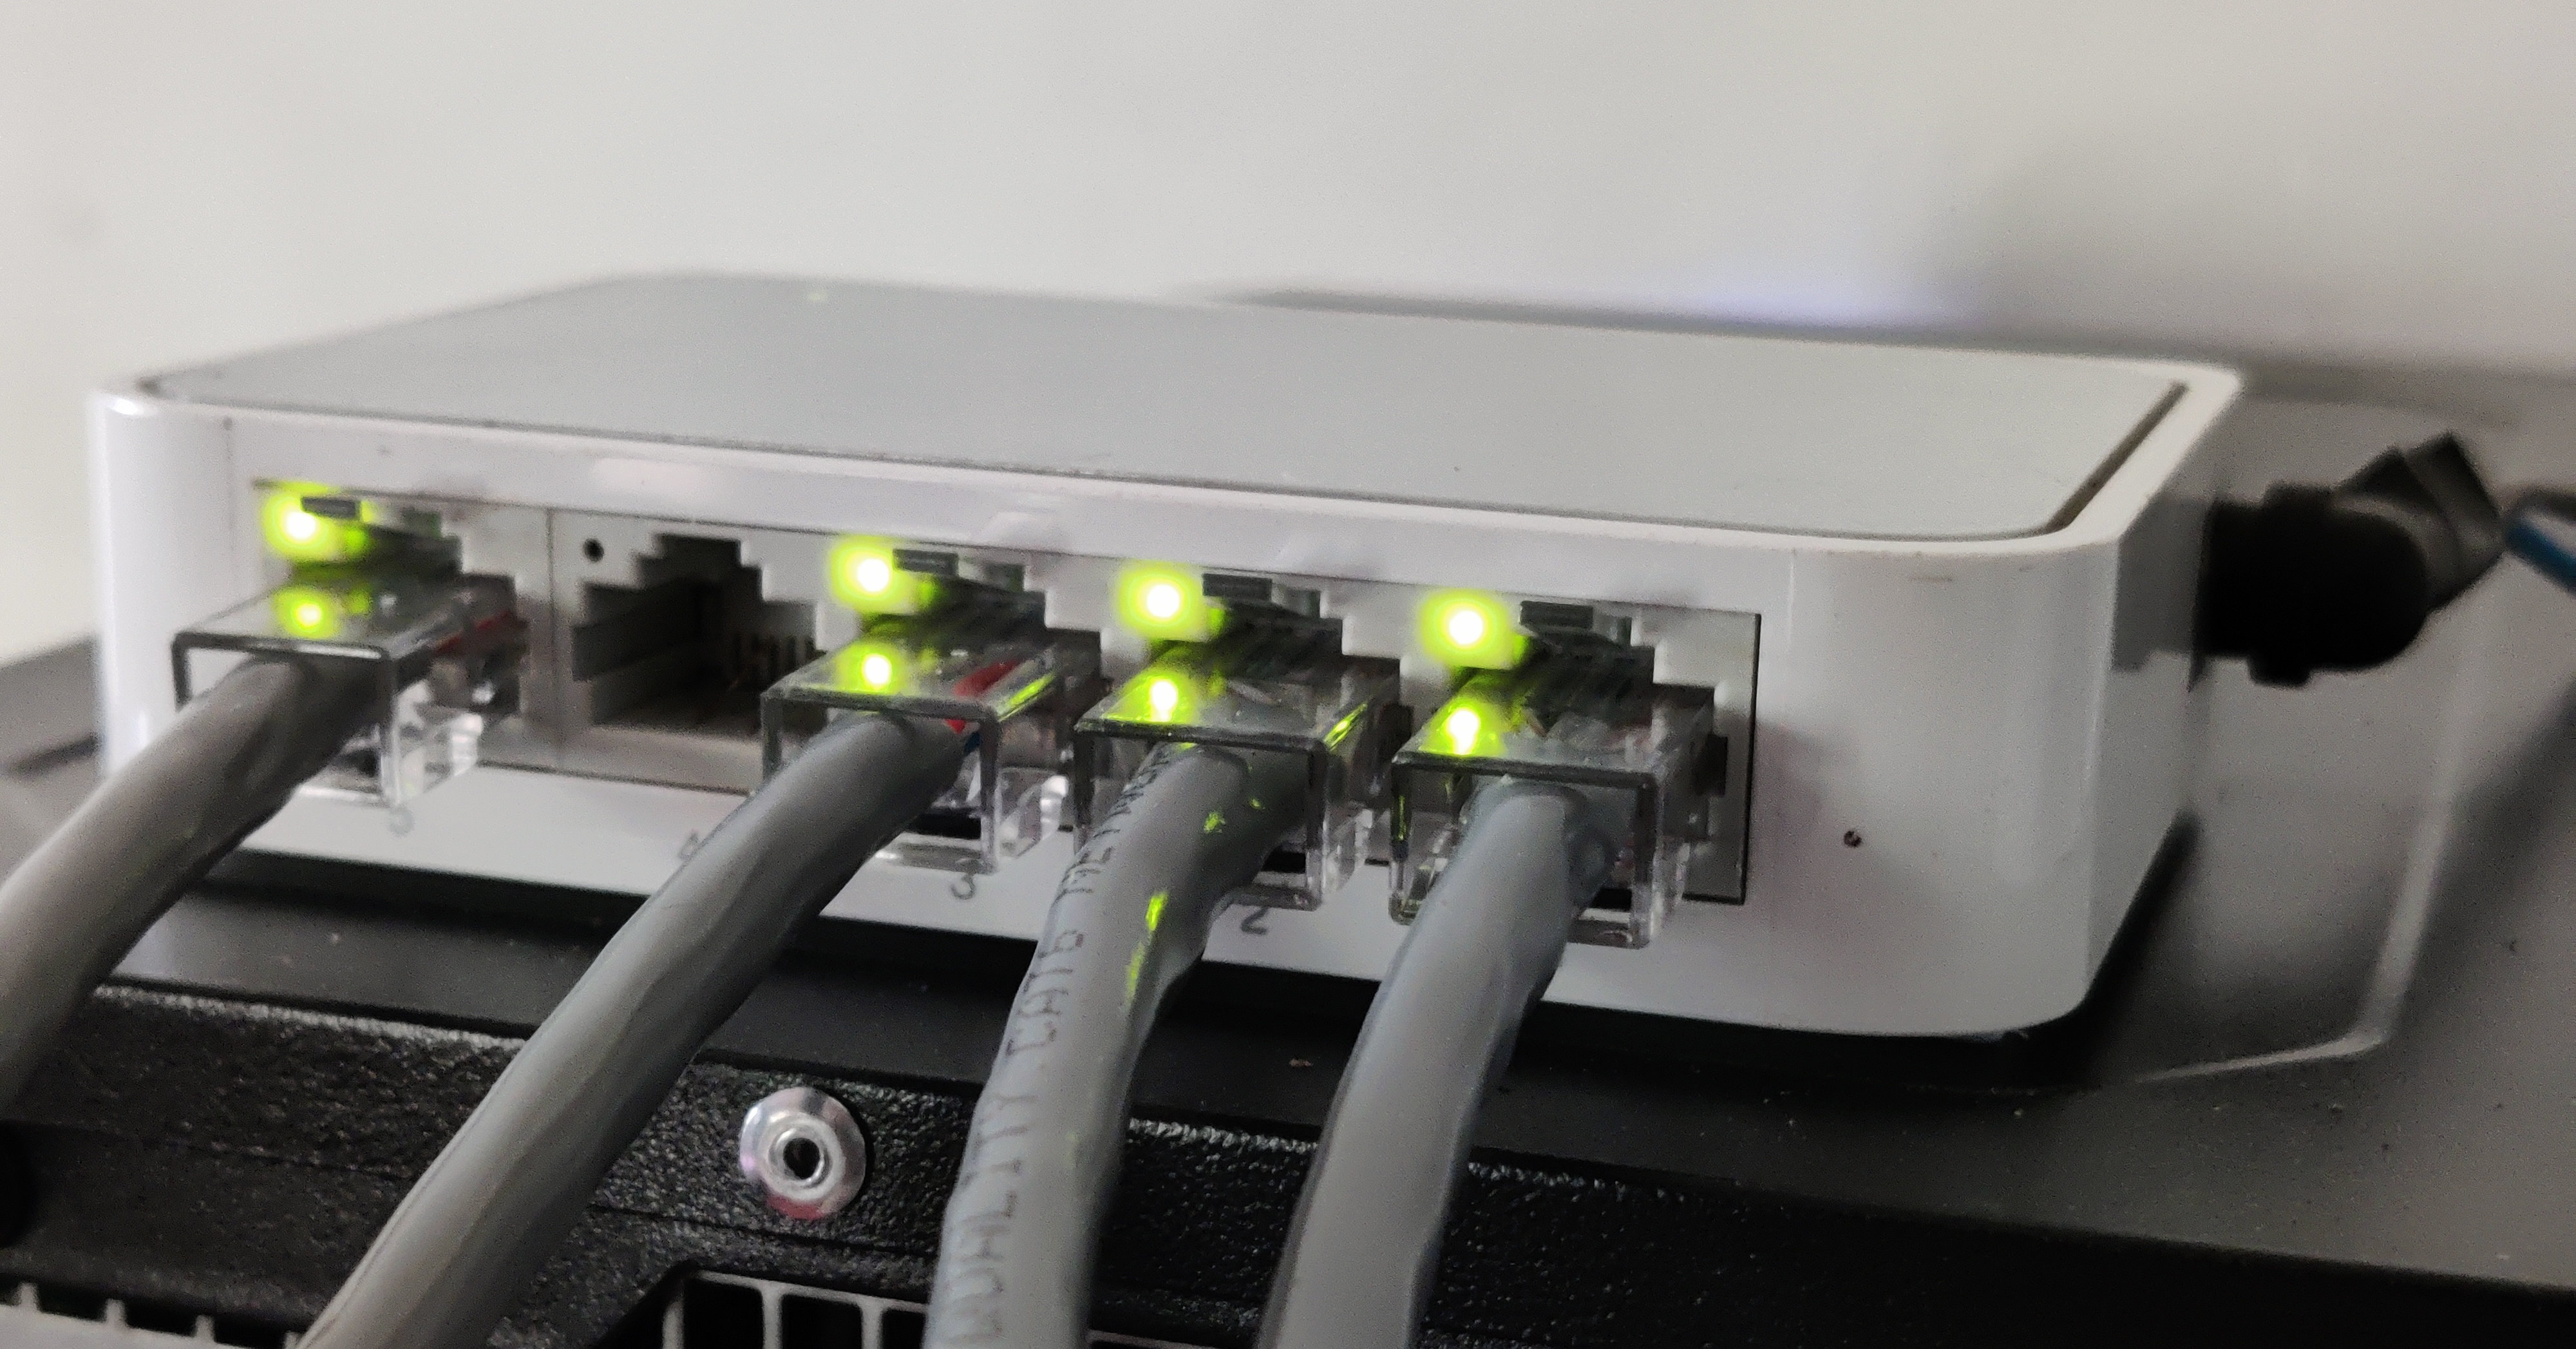
The PC used as the router and switch mounted on top of it. PC power supply can be converted into solar powered battery due to it’s low power usage.
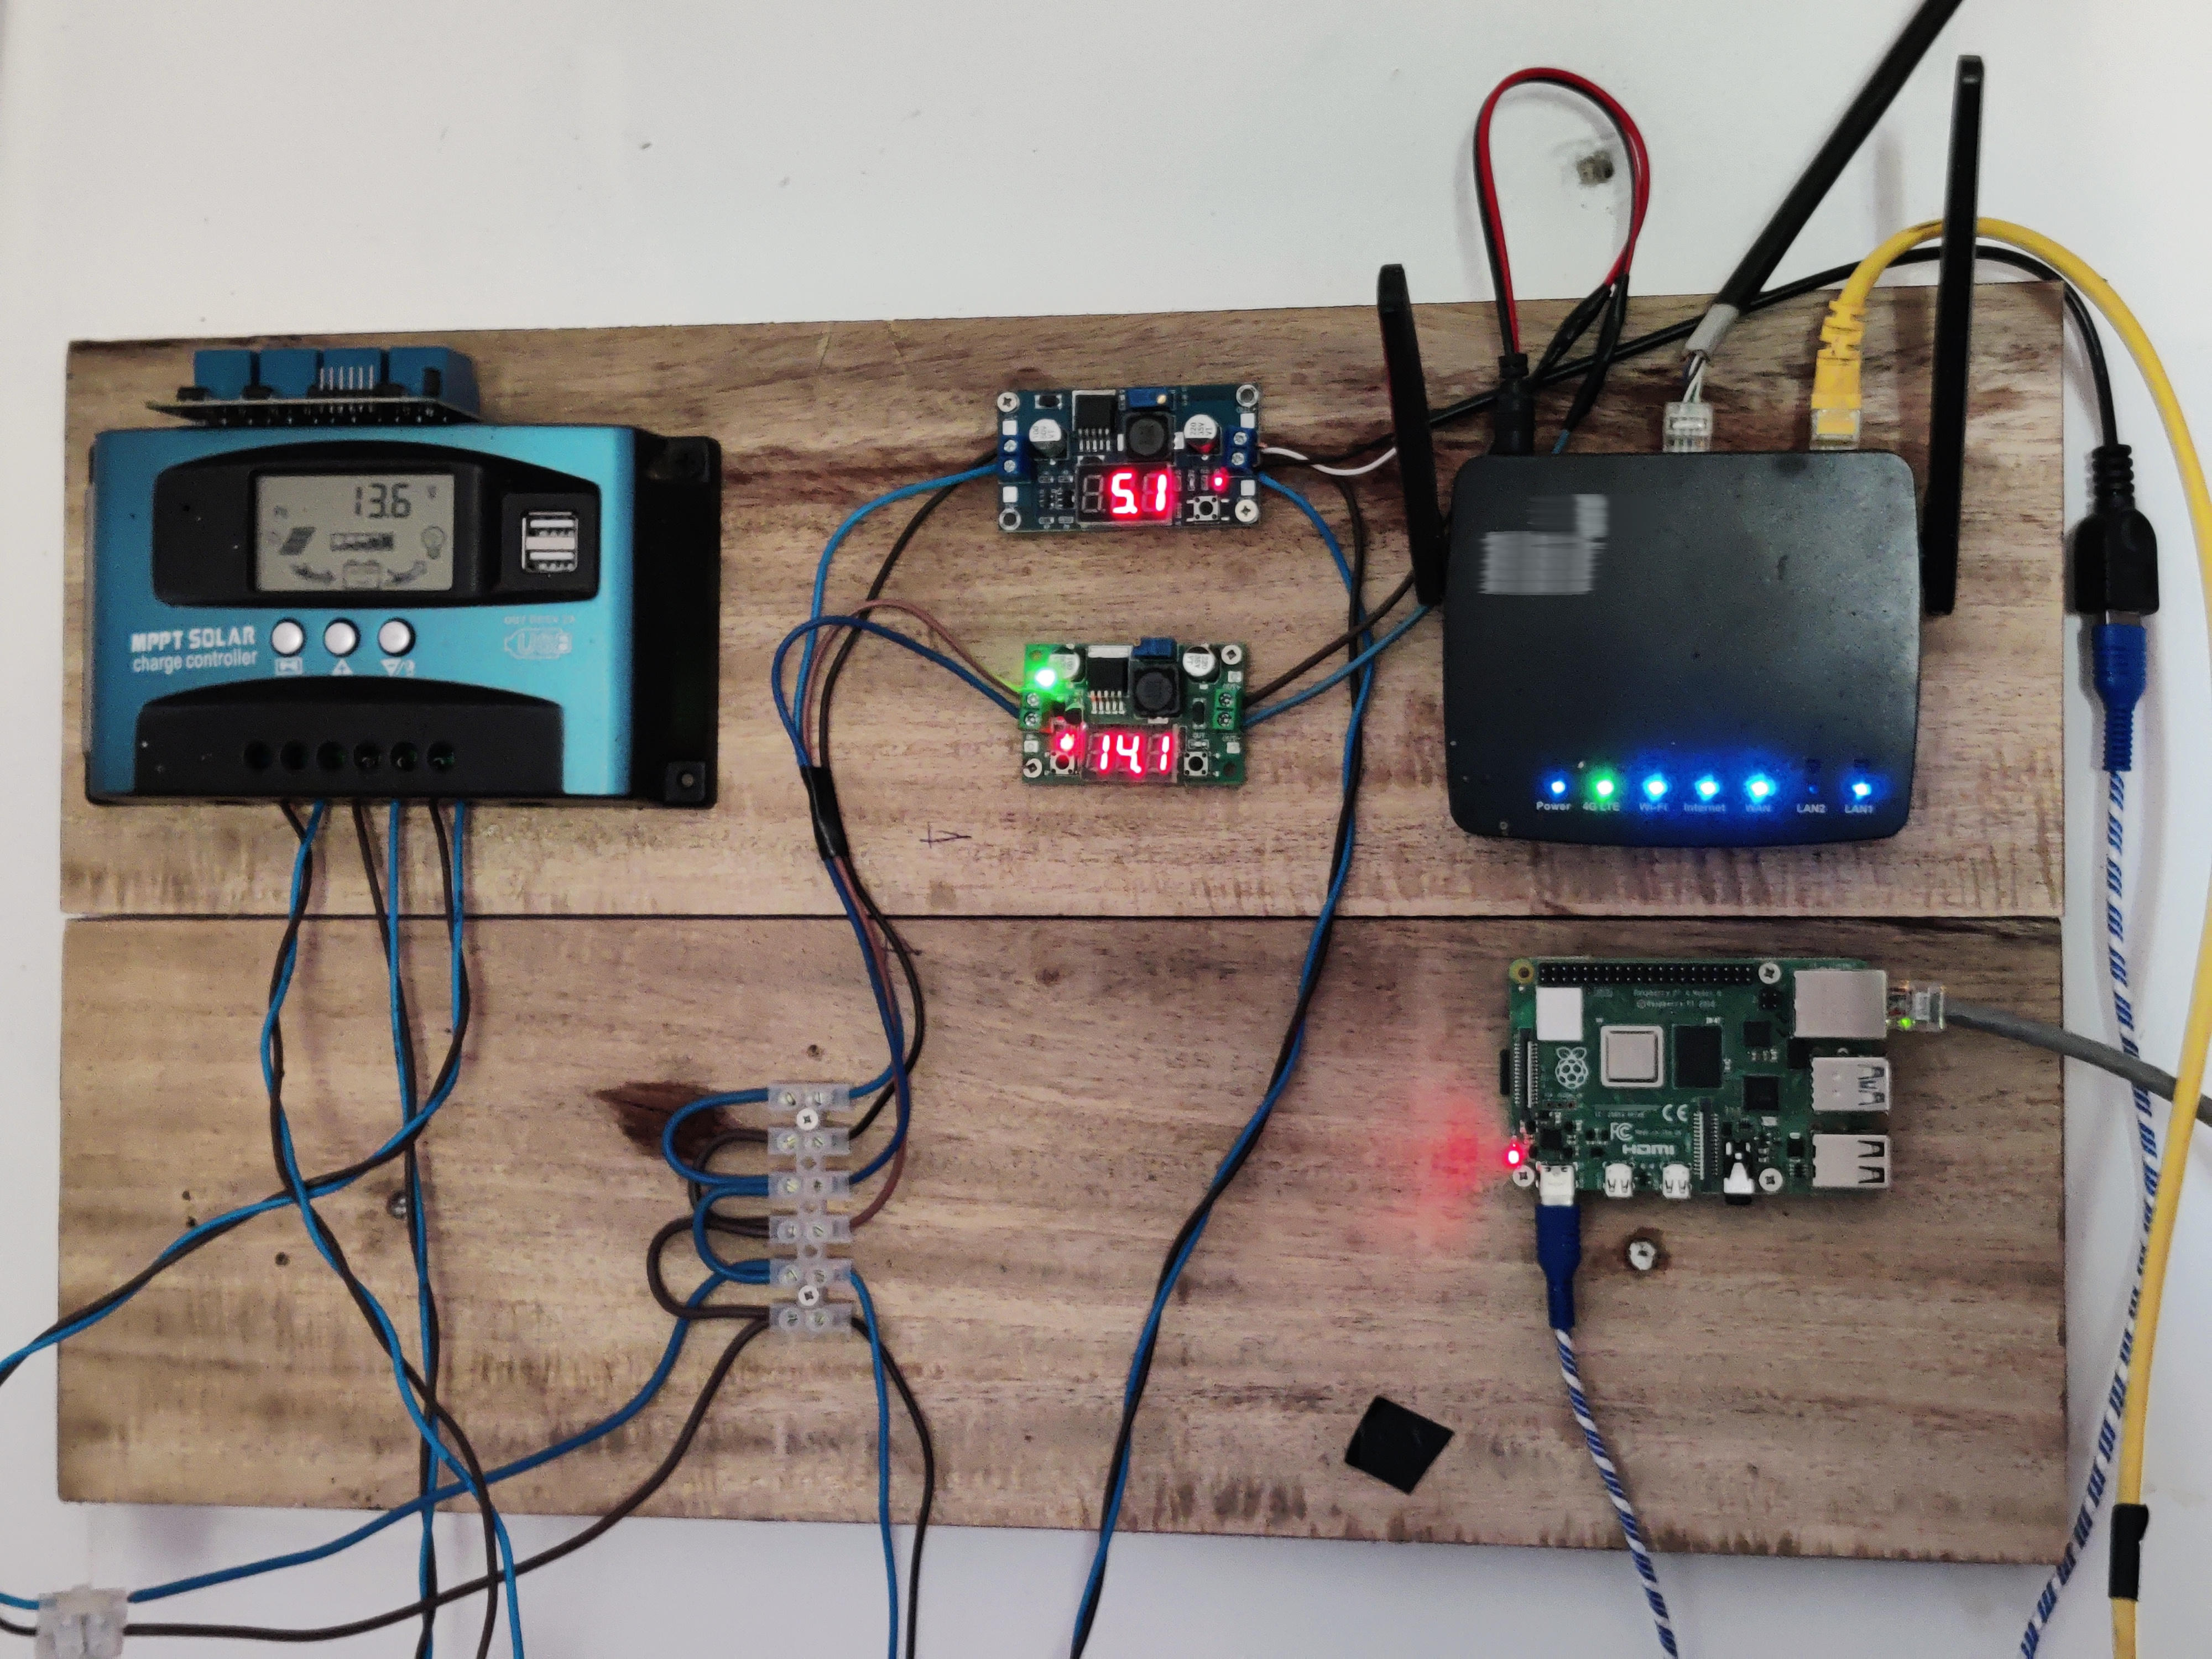
The devices shown in the image—namely, the switch, ISP router, and Raspberry Pi 4—are currently powered by solar energy. They’ve been operational for a continuous span of two weeks. To ensure stable voltage for the electronics, buck converters have been employed instead of relying solely on the direct output from the solar-powered system.
